Cabbage and Meatballs

Every year around Succot I make a giant pot of my mother’s stuffed cabbage recipe (with some small tweaks) and distribute it to my in laws and parents.It disappears off plates faster than I can blink. However the rolling and stuffing make this a one time a year deal. The At Home Gourmet, as well as several other cookbooks, tried to solve this dilemma by creating the same flavorful dish WITHOUT the need to neatly package the meat inside the cabbage.

This cabbage and meatballs recipe was trotted out recently on a WEEKDAY night much to the shock and awe of my family. Not only was it not Succot it wasn’t even Shabbos! That’s how easy this recipe looked – I didn’t wait for a special occasion.

Ingredients: ground beef, matzo meal, egg, salt, pepper, garlic powder, shredded cabbage, ketchup, tomato sauce, brown sugar, lemon juice, salt, watercabbage and meatballs raw

The Process: I mixed the beef, matzoh, egg and spices in a bowl. The rest of the ingredients were dumped into a pot over a low flame. When the sauce and cabbage began to boil I formed the meatballs and dropped them in. Everything cooked for 1.5 hours while I went about my business as usual.

For a cheaper but more work version you can slice your own cabbage instead of buying the pre-shredded bag.

The Results: This too disappeared before I could blink. Bowls of meatballs and cabbage were being fought over by family members. A huge hit and very easy to make. However you cannot scrimp on the cooking time – your cabbage will be raw!

I still like to make the pretty cabbage rolls for Succot (this recipe looks like it is depicted – a stew like mix). If time was short though, this would be a pretty good substitute.cabbage and meatballs cooked

Granola Bars

The At Home Gourmet is full of foods that I would typically purchase and eat, in more wholesome versions. This granola recipe is a prime example. Chockfull of fruit and nuts it really packs in the flavor. I was eager to try it as I currently purchase a ridiculous amount of expensive granola ( Love Crunch Dark Chocolate & Peanut Butter is my favorite but it can get pricey).

Ingredients: Old fashioned oats, almonds, pecans, shredded coconut, butter, honey, brown sugar, vanilla, salt, pitted dates, dried figs, dried apricots, craisins, raisins

To save on costs, I bought most of this in the bulk food section of my grocery.

IMG_5759


The Process: First I preheated the oven and prepped a baking sheet with a silicone liner. Then I mixed the oats, almonds, pecans and coconuts together and spread the mixture in an even layer on the baking sheet. This toasted in the oven for ten minutes. IMG_5764


While that was going on, I melted the butter, honey, brown sugar, vanilla and salt over a low flame and brought the whole thing to a boil. The oat mixture was then ready to be transferred to a mixing bowl. The boiling honey was poured over it and the dried fruit quickly added in. Everything got pressed onto the prepared pan and made a return trip into the oven for 30 minutes. I then let everything cool before attempting to slice it.

IMG_5769

The Results: This oatmeal was crumblier than I anticipated based on the photo of a neat square in the cookbook. I had quite a bit of trouble cutting a neat square, even with appropriate cooling of the granola. The photo below is the only square I managed to cut. The rest was eaten in pieces. However this was very tasty and great for sprinkling into yogurt or munching dry.

I was sadly unable to share the granola with one of my children as she is pecan allergic. Therefore this was an adult only food in my house, but I would bet that older children would enjoy it. Obviously this granola is not for the toddler set as it contains some choking hazards.

Screen Shot 2017-09-11 at 11.04.03 AM

White Chocolate Chip & Dried Apricot Cookies

I love cookies but I have never appreciated oatmeal raisin cookies. That’s why I was delighted to see The Silver Platter cookbook agreed with me and placed white chocolate chips and apricots in these oatmeal cookies instead. I made these to bring to work on my birthday, together with the Chocolate Chunk Cranberry Cookies on the next page.

Ingredients: vegetable oil, brown sugar, sugar, egg, vanilla, flour, rolled oats, baking soda, salt, dried apricot, white chocolate chips

The Process: I preheated the oven to 350 and lined some baking sheets with silicone baking mats. The recipe suggests parchment paper but I find I get better results with the silicone mats and they are reusable and therefore better for the planet. I then mixed the oil, sugars, egg and vanilla until blended. I then took the dry ingredients and mixed them into the wet ones until combined into a ball. The apricots and chips were folded in.

I used a cookie scoop to place golf sized balls onto the baking trays and pressed each to slightly flatten it. They were then baked for 12-15 minutes.

Results: Delicious! They flew off the plate. I brought some to work and they too flew off the plate. Apricot is definitely a much pairing with oatmeal than raising for me. The only mildly time consuming part was cutting the dried apricots and even that took only 2-3 minutes.

Sweet and Sour Meatballs

As I work my way through The Bais Yaakov Cookbook, I decided to make a foray into the meat section. What could be simpler than meatballs? The ingredients for this recipe were also easily on hand so I dove right in!

Ingredients: ground beef, eggs, bread crumbs, ketchup, garlic, onion, tomato sauce, sugar, brown sugar, lemon juice

Substitutions: I have used corn flake crumbs instead of bread crumbs when there were none in the house. I have also used ground turkey instead of ground meat if that was more readily availablesweet and sour meatball raw

The Process:

First I combined the ground meat, ketchup, bread crumbs, eggs and spices into a mixture. Then I threw all the sauce ingredients into a pot and brought it to a boil. I then rolled balls from the meat mixture, dropped them into the simmering sauce, covered it and let is sit for two hours until done.

During the simmering phase the house was filled with a delicious aroma and several hungry people wandered into the kitchen asking when the meatballs would be ready for consumption. If you serve your meatballs over rice or noodles it is a good idea to prepare that during this time as well.swet and sour meatball cooking

The Results: Delicious! And easy. However the two hour cook time means this is not necessarily fast. The one change I would suggest to the printed instructions is to prepare the sauce first. Having the simmering sauce on hand means that once you make the meat mixture you can drop the balls right in. Otherwise you are cleaning your hands from raw meat and throwing together the sauce while the meat mixture sits waiting.

Using a large pot also helps there be room for all the meatballs to sit in a single layer.sweet and sour meatball

Mommy’s Asian Chicken and Spaghetti

Who doesn’t love spaghetti? What kid won’t eat chicken? Put the two together and you have a staple food in our house: chicken and spaghetti. However this recipe from The At Home Gourmet is not the traditional Sephardic chicken and spaghetti we are used to. It uses soy sauce for a more Asian taste and looked like it would take significantly less time to create.

Ingredients; spaghetti, chicken cutlets cut into strips, olive oil, garlic, soy sauce, sugar, ground ginger

The Process: First things first, you have to boil the spaghetti according to package directions and drain it. Nothing surprising about that.

While the spaghetti was cooking I sautéed the garlic in the olive oil and then added the chickens trips to the hot pan and cooked them for about one minute. Then I added soy sauce, sugar and ginger. The chicken was coated in the resulting sauce, and cooked for another 4-5 minutes. I found stirring and having a non stick pan important to prevent the chicken from burning. I tossed this into the spaghetti, a

nd voila dinner as served.

The Results: For the amount of effort needed (minimal) this turned out pretty well. We still prefer the taste of Chicken and Spaghetti from the Aroma’s of Aleppo cookbook but that recipe takes a significant investment of time and labor. I also didn’t love how much sugar was in the recipe. I will still make this again as a quick and easy dinner but it is not on the all time favorite list.

Asian Steak Salad

steak salad veggies

Steak Salad is one of my favorite foods. When the steak is marinated properly it becomes a juicy and filling addition to your salad.

This Asian steak salad recipe really looked like a flavorful twist on an old favorite. I typically like to use a thick juicy piece of meat, like London Broil, for steak salad but this recipe from Kosher by Design called for a thinner skirt steak which cut down on cooking/prep time.

Ingredients: olive oil, garlic, soy sauce, olive oil, sesame oil, balsamic vinegar, Dijon mustard, peanut or olive oil, red onion, skirt steak cut in thin strips,

yellow pepper, red pepper, mixed greens, sesame seeds

Substitutions: I have used peanut oil but have also substituted with olive oil when peanut allergies became an issue

steak salad dressingThe Process: First I browned the ginger and garlic in olive oil. The soy sauce, olive oil, sesame oil, vinegar and mustard where pulsed in the food processor and then mixed with the ginger and garlic to form the dressing.

I then heated the peanut oil and cooked the steak in it for ten minutes. When it was done I removed it from the skillet with a slatted spatula and set it aside. I placed the red onion and bell peppers in the pan to saute. When they were almost done I added 2-3 tablespoons of dressing cooking and removed it from the heat. The dressing is then added to the green and the peppers and steak are placed on top with a sprinkling of sesame seeds.

steak salad veggies cooking


The Results: This salad is amazing. It tastes wonderful and is a big hit with company. It is not quite as colorful as the one in the photo unless you under cook the peppers – which tastes the change of the salad and I wouldn’t recommend it.

steak salad veggies cooked


Old-Fashioned Sugar Cookies

old fashioned sugar cookie dough

When looking for rainy day activities baking and decorating sugar cookies is definitely a no brainer. This classic dough from The Complete Cookie looked fun to try, simple and sweet.

Ingredients: flour, baking powder, salt, sugar, butter, eggs, lemon zest and vanilla

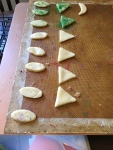
Substitutions: I didn’t have cookie cutters so we used my daughters shape sorters to cut different shapes. This was great as she had to properly name the shape in order to get a cookie!

old fashoined sugar cookie miing

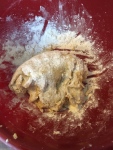
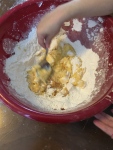
The Process: First I combined all the dry ingredients. I then pulsed the butter into the sugar using a food processor. Slowly I added the eggs, lemon zest and vanilla. I then added the flour (I mixed it in by hand instead of pulsing in the food processor). I felt I needed  few extra tablespoons of flour as the dough was way too sticky to be formed into a ball. Then I placed it in the fridge to cool. My children were very impatient to continue so I took a portion of dough out after 1 hour. This definitely was not a good move as the dough was difficult to roll. The dough that sat and chilled for the entire 3 hours, as advised, was much easier to manipulate.

I used my french style rolling pin to roll neat sheets of dough while the kids used mini 

old fashoined sugar cookie

rolling pins to roll out small patches of dough. We cut the cookies easily  and the refrigerated dough did not stick to the cutters. I placed them on silicone baking mats and used a variety of colored sugars to decorate. Everything was placed in a preheated oven at 350 degrees and baked them for 10 minutes. Do not over bake!


The Results: I definitely felt the recipe needed 1/3 c to 1/4 c more flour. The rolling process on the chilled dough was excellent. It did not stick to the rolling pin or the cookie cutters. There is no picture to compare to but these did retain their shape beautifully and did not spread on the sheet.old fashoined sugar cookie on tray

Sticky Red Potatoes

As previously mentioned I have one child who absolutely refuses to eat all white potatoes – including french fries! I have no idea where she get this from as potatoes were a pretty big staple for me growing up. These Sticky Red Potatoes from Starters & Sides Made Easy reminded me of a more sophisticated version of the erstwhile childhood favorite – fries and ketchup.

Ingredients: Yukon Gold potatoes, chili powder, ketchup, salt, oil, vinegar, garlic cloves,

red potatoes raw with sauce

honey

Substitutions: None

The Process: First the oven is preheated to 400 F. The instructions call for you to grease the pan, but I often use silicone baking mats instead. The potatoes are tossed in chili powder, ketchup, salt and oil and spread into a single layer on the baking sheet. They then bake for 45-55 minutes. While the potatoes were baking I prepared the sauce, which is a mixture of oil, ketchup, vinegar, garlic, honey and chili powder mixed in a saucepan over a medium flame. When the potatoes were ready I tossed them in the sauce and baked them for an additional ten minutes.

The Results: These tasted OK but were nothing super special. My child who refuses potatoes, still refused these. One interesting note is that the potatoes in the cookbook photo are in fact fried. A small blurb at the bottom of the recipe tells you that if you want to fry your potatoes you can, just replace the oil in the sauce with cornstarch. I was therefore not shocked to find my potatoes a bit crumblier than the ones in the photo. Many of them broke when being tossed with the sauce. They still looked nice, but not nearly as professional as the potatoes in the photo, that held together well because they had been fried. I thought it a strange choice to show a photo of food prepared using alternate instructions than those in the recipe.

red poatoes raw sauce2

Whiskey Sweet Potatoes

I have one child that likes white potatoes and one child that likes sweet potatoes.

However EVERYONE likes candied sweet potatoes. There are many variations on this theme including several that use different types of alcohol. This recipe for Whiskey Sweet Potatoes from Starters & Sides Made Easy looked like a fun variation on the theme and not too difficult in terms of prep and clean up.

Ingredients: sweet potatoes, salt, pepper, brown sugar, whiskey, honey, oil

Substitutions: None

The process: First the sweet potatoes are baked at 425 F for 20 minutes. Then I removed them from the oven and sliced them in half. The brown sugar, whiskey, honey and oil are all melted into a pot.  It takes only 2 minutes for the sugar to dissolve so don’t start too early – you’ll just burn off all the liquid waiting. I then used a silicone pastry brush to brush the mixture over the cut sweet potatoes and seasoned them with s alt and pepper. The sweet potatoes are then returned for an additional 20 minutes of oven time.

The Results: Delicious, if a bit messy for kids to eat. This was fast and tasty. The only hitch is that you must put the saucepan in water immediately after using the sauce otherwise the leftovers will form a sticky coat on the pan and become impossible to clean.

Carrot Souffle

Boiling Carrots

This recipe is not unique to The Bais Yaakov Cookbook. I have seen similar carrot kugels and carrot souffles’ in almost every Kosher cookbook, with small variations. For instance I have crushed everything from Chex to Cheerios while making the crispy topping. Most of these recipes, however, use baby food carrots. This recipe asks the industrious cook to boil and mash their own carrots. Is it worth the effort?


Ingredients: carrots, eggs, oil, sugar, flour, baking powder, vanilla, cornflake crumbs, brown sugar, margarine, chopped nuts, cinnamon

Carrot Mash    

Substitutions: I use Earth Balance instead of margarine. For chopped nuts I used almonds because that is the only nut nobody in my home is allergic to. I suspect pecans and walnuts may have worked better.

The Process: You start by boiling the carrots so that they can be easily mashed. I found I needed longer than the suggested 15 minutes. I had to boil the carrots for a full 30 minutes before I could easily mash them. While I used a fork you might get a smoother mash with a food processor (this is not suggested in the recipe).

I then preheated the oven and started adding ingredients to the carrot mash. All of this was poured into an oven to table baking dish. The recipe allows for either one large dish or a few small ramekins. While the ramekins might be prettier the one large dish was easier to handle and serve.

I mixed the cornflakes, sugar, Earth Balance and nuts to make a topping. This crumble was spread over the top and the entire thing was baked for 40 minutes.

The Results: It tasted like most other carrot kugels I have tried, except slightly sweeter and slightly more gritty since I hand mashed the carrots. My kids seemed to love it, with one notable exception – they asked me to remove the sugary cereal topping! Is it worth the extra time to mash the carrots? Probably not. It turned a 15 minute process into a 45 minute affair.

                                Carrot Souffle