White Chocolate Chip & Dried Apricot Cookies

I love cookies but I have never appreciated oatmeal raisin cookies. That’s why I was delighted to see The Silver Platter cookbook agreed with me and placed white chocolate chips and apricots in these oatmeal cookies instead. I made these to bring to work on my birthday, together with the Chocolate Chunk Cranberry Cookies on the next page.

Ingredients: vegetable oil, brown sugar, sugar, egg, vanilla, flour, rolled oats, baking soda, salt, dried apricot, white chocolate chips

The Process: I preheated the oven to 350 and lined some baking sheets with silicone baking mats. The recipe suggests parchment paper but I find I get better results with the silicone mats and they are reusable and therefore better for the planet. I then mixed the oil, sugars, egg and vanilla until blended. I then took the dry ingredients and mixed them into the wet ones until combined into a ball. The apricots and chips were folded in.

I used a cookie scoop to place golf sized balls onto the baking trays and pressed each to slightly flatten it. They were then baked for 12-15 minutes.

Results: Delicious! They flew off the plate. I brought some to work and they too flew off the plate. Apricot is definitely a much pairing with oatmeal than raising for me. The only mildly time consuming part was cutting the dried apricots and even that took only 2-3 minutes.

Old-Fashioned Sugar Cookies

old fashioned sugar cookie dough

When looking for rainy day activities baking and decorating sugar cookies is definitely a no brainer. This classic dough from The Complete Cookie looked fun to try, simple and sweet.

Ingredients: flour, baking powder, salt, sugar, butter, eggs, lemon zest and vanilla

Substitutions: I didn’t have cookie cutters so we used my daughters shape sorters to cut different shapes. This was great as she had to properly name the shape in order to get a cookie!

old fashoined sugar cookie miing

The Process: First I combined all the dry ingredients. I then pulsed the butter into the sugar using a food processor. Slowly I added the eggs, lemon zest and vanilla. I then added the flour (I mixed it in by hand instead of pulsing in the food processor). I felt I needed  few extra tablespoons of flour as the dough was way too sticky to be formed into a ball. Then I placed it in the fridge to cool. My children were very impatient to continue so I took a portion of dough out after 1 hour. This definitely was not a good move as the dough was difficult to roll. The dough that sat and chilled for the entire 3 hours, as advised, was much easier to manipulate.

I used my french style rolling pin to roll neat sheets of dough while the kids used mini 

old fashoined sugar cookie

rolling pins to roll out small patches of dough. We cut the cookies easily  and the refrigerated dough did not stick to the cutters. I placed them on silicone baking mats and used a variety of colored sugars to decorate. Everything was placed in a preheated oven at 350 degrees and baked them for 10 minutes. Do not over bake!


The Results: I definitely felt the recipe needed 1/3 c to 1/4 c more flour. The rolling process on the chilled dough was excellent. It did not stick to the rolling pin or the cookie cutters. There is no picture to compare to but these did retain their shape beautifully and did not spread on the sheet.old fashoined sugar cookie on tray

Chocolate Pecan Pie

The first time I tried this recipe from Kosher by Design I was a spunky young newlywed preparing Thanksgiving dinner. Pecan Pie is usually too gooey for my taste, with a thin layer of pecans on top of a layer of gelatinous mush. Chocolate however, pair s very nicely with nuts so when I was planning Thanksgiving desserts, this was on obvious one to try. Of course the pressure was on. Remember that dinner I was preparing for? over 50 people were showing up!

Ingredients: margarine, semisweet chocolate morsels, unbaked frozen pie crust, eggs, brown sugar, dark corn syrup, vanilla, pecan halves

Substitutions: I used Earth Balance instead of Margarine

The Process:

First I preheated the oven to 350. Then I started melting margarine over a small flame, adding in half of the chocolate pieces. When everything was well mixed, I removed it from the heat.

To prepare the pie crust I brushed it with a little egg. Then I mixed the sugar, corn syrup, vanilla and eggs into the chocolate mixture. The remaining chocolate pieces were stirred in  and the whole thing went into the pie crust. This bakes for 55 minutes.

The Results:

I love that this recipe doesn’t require a double boiler, a piece of equipment that I have always wanted but never gotten around to buying. I also loved how easy it was – when preparing a 50 person dinner the last thing you need is an hour spent on dessert. My main issue was oven time. 55 minutes is a lot more than a batch of cookies would bake.

The taste however, was excellent. The mixed in chocolate pieces changed the gelatinous mush to something more textured. I’ve tried the recipe many times since and I definitely do not recommend skimping on the corn syrup. Without it the pie is brittle and dry.

Chocolate Chip-Apricot Bars

Jam and Chocolate Spread

Bar cookies are my favorite type of cookie. More substantial than your standard round cookie, with increased fillings and topping possibilities. This Apricot Jam bar from The Spice and Spirit was therefore an easy pick for me to try.

Ingredients: margarine, sugar, egg yolks, flour, vanilla, apricot jam, chocolate chips, egg whites, salt, walnuts

Substitutions: I use Earth Balance instead of margarine

The Process: 

Raw Cookie Base

First I preheated the oven to 350 and used that Earth Balance wrapper to grease the pan. I used my hand mixer to cream the butter, sugar and egg yolks. The flour and vanilla were added in and kneaded by hand as per the instructions. This was helpful as I then had no trouble using my hands to pat the dough into the bottom of a baking pan. Then I slid it into the oven for 15 minutes until slightly browned.

When removed from the oven I spread the jam on top followed by the chocolate chips. I beat the egg whites into a white stiff foam that I used to call “snow” when I used to bake with my mother as a kid. Then I folded in some sugar that had been set aside and the nuts. This was spread over the chips and everything was slid back into the oven for 25 minutes.

Raw “Snow” on Apricot Bars

The Results:

The bars were slightly unmanageable when trying to cut them into neat squares (probably would have been easier if they were frozen). I also did not necessarily enjoy the combination of chocolate and apricot. However others did. So I’d rate this cookie as a partial success.

Chocolate Chip Apricot Bar


Ka’ak-Ib-Loz

When I married a Sephardic Jew there were lots of new traditions to get used to – even the engagement party pastries were new and exotic. Instead of the usual heart shaped cookies with our names embossed them I was enchanted to see these sweet little wreaths – Ka’ak-Ib-Loz decorating the tables. Made out of almond and pistachio marzipan they stole the show. For the Love of Cooking was gifted to me a few years later by our grandmother and I decided to try my hand at making them.

As Passover approaches I’m happy to note these cookies are in fact Kosher for Passover. However if you have pistachio allergy in the home like I do – stick to just making the rings with almonds.

Ingredients:

almonds, pistachio nuts, confectioners sugar, orange water, green food coloring

The Process:

The most difficult part of this process is the first part. You have to blanch the nuts (instructions not provided in the cookbook) and then shell them – peeling off all the little brown outside bits from the almonds. This cannot be done if you haven’t blanched the almonds for long enough. Then you grind the nuts in a food processor. At the time I did not have a large food processor, only a small table top one. Then I pulsed in the sugar.

As my pistachios did not have a deep green color after blending I went ahead and mixed the orange water and food coloring in with the nuts. You can skip the food coloring if your pistachios were more vivid than mine. I then tried to shape the mixture into balls and join the ends to make a ring. This was pretty difficult. The mixture was a little crumbly and I felt I needed more liquid of some sort to make it pliable. At this point you can crimp the edges to make them more wreath like before leaving them out to dry. I tried to twist several strands together as well but that didn’t quite pan out given the dry/brittle nature of the dough.

The Results:

The taste was great, but the shapes were not as pretty as I liked. I think if I had a finer grind on the nuts and a little more water I could have done fun things like make different colors and shapes. 


Egg-Free Sprinkle Cookie

While eggs are not an allergen we worry about in my house I was still excited to try this Egg-Free Sprinkle Cookie recipe from Kids Cooking Made Easy. I run out of eggs all the time and this seemed like a quick and easy recipe I could make with my kids. It also looked quick which is exactly what I need for shabbat prep in the winter!

Ingredients:

butter or margarine (I use Earth Balance), sugar, confectioners sugar, vanilla extract, flour, rainbow sprinkles

The Process:

First you preheat the oven and line baking sheets. The recipe calls for parchment paper but I always use silicone baking mats as they never smoke (parchment paper tends to set off my smoke alarm) and cookies bake more evenly with the mats without sticking. I then creamed the margarine and sugar adding in the vanilla and flour until it formed a nice ball of dough. The kids felt it “looked like play dough”.

We then rolled the balls into circles, dipped them into rainbow sprinkles while flattening them a little bit. Then they were placed on the pre-lined baking sheet and bake.

The Results:

The recipe was easy to follow and the instructions were correct. The cookies did not spread further than the recipe said they would. However I would say the baking time of 15 minutes is more of a max time. If you have an oven that runs hot you will want to them out a bit earlier to keep a moist soft cookie. They disappeared pretty quickly from the kitchen and my company even asked to take some home!

          Egg Free Sprinkle Cookie

White Chocolate Chip and Macadamia Nut Cookies

Bais Yaakov Cookbook

White Chocolate macadamia nut cookie

From the moment I opened the Bais Yaakov Cookbook I was itching to make these cookies. The photo jumped off the page and made my mouth water. I also love white chocolate chips way more than standard run of the mill chips. I was simply waiting for the ideal moment.

The ideal moment never came. Working long nights and waking up extremely early doesn’t leave much time for anything else. What time I do have gets spent with family or studying. So instead of the perfect time, I stayed up late one night to bake. I decided to stop studying, give up a little sleep and make cookies so that hte next day, while running around the emergency department seeing consultant patients, I would at least have snacks. In a hospital with limited Kosher food, that made all the difference. The residents didn’t mind the extra snacks either.

Ingredients: 

margarine, sugar, brown sugar, eggs, vanilla, all purpose flour, baking soda, salt, old fashioned oats, white chocolate chips, chocolate bar, macadamia nuts, dried cranberries (optional)

substitutions: Earth Balance baking stick instead of margarine

The Process:

This is a one bowl cookie recipe. I threw everything but the delicate ingredients into a large bowl and mixed. I used my hand mixer because the recipe calls for “creaming” the sugar and margarine, but honestly you could probably get away without it. Then I folded in the chips, nuts and cranberries. I dropped spoonfuls onto my silicone mat lined cookie sheets and popped them into the preheated oven for 10 minutes.

The Results:

The cookies looked like the ones in the cookbook photo, except more rounded. If you like a flat cookie I suggest pressing down on the dough ball to flatten it as the dough seems to retain its shape when baking. The photo shows a crunchy cookie, and they were. If you are like me and prefer a chewier cookie then shave off some time from the baking time.

While the recipe says the cranberries are optional, I feel they are not. They added a lot to the taste of the cookie. Instead, the macadamia nut should be optional. I personally did not enjoy the flavor and crunch they added. Plus they meant the cookies were off limits to all people with nut allergies. It’s a great cookie without the (overpriced) nuts! white choc macadamia cookie 2


Date Cookies

We call these “Ajweh” and the family joke is that we bring them out every time someone is about to get married. I still remember a huge plate of them being brought out when I met my husbands grandparents for the first time. I had no idea what their significance was, but I do remember they tasted delicious, homemade and made me feel very welcome.

This is the first time I’ve ever tried to make date cakes myself, and I wanted an authentic, traditional recipe. Rae Dayan’s book “For the Love of Cooking” is known to be an accurate record of Syrian cooking.

Ingredients

flour, water, margarine, medjool dates, water, orange rind,

While you can use other dates, medjool dates are by far preferred. There is no comparable date. I substituted Earth Balance for for the margarine.

The Process:

The dough was surprisingly easy to mix by hand. It formed a neat little ball with just flour, water and

margarine. I quartered the dates and made sure all pits were removed and then placed then in a pot with water to cook for 15 minutes. I then mashed it up with spices and let it cool. During this time I formed circles from the dough and flattened them out. This dough was surprisingly easy to roll out and was very pliable. I placed a heaping spoon of filling in each dough circle, rolled it and bent into a crescent shape. They were then baked for 20 minutes. The recipe calls for 15-20 minutes however I believe the full 20 was needed and the you will have to go by a timer because the dough does not change color in the baking process. The baked cookies are then dusted with confectioners sugar.

The Results:

The jury is out on this one. There is no picture to compare too, but I think my cookies looked very lovely. However they do not taste as good as Grandma’s. That’s to be expected – nothing ever is. The cakes still taste pretty good if I do say so myself.

Holiday Truffles

I all ready knew how this recipe was going to turn out because my husband and I made these truffles together the first year we got married. We’ve made them again every year. They are easy, inexpensive and delicious. A win from Gifts from the Country Kitchen!

Ingredients:IMG_0854

3 packages (12 oz each) semisweet chocolate chips, 2 1/4 cups condensed milk, 1/2 tsp each orange, peppermint and almond extract, 1 1/2 lb white candy coating, 3/4 lb dark candy coating melted, 1/2 cup ground almonds

The Process:

The trickiest part about making truffles is melting the chocolate. When the recipe tells you to microwave in short busts, it means it! Heating for longer can lead to burnt chocolate. This occurred when a certain person who shall remain nameless, but is married to me, thought that one full minute was better than short bursts of 15 seconds. Heating slowly, and stirring, allows the chocolate to melt properly. Since this is semi-sweet chocolate you don’t have to be as worried as you would be while working with milk chocolate, but it’s still difficult. Double boilers are also great for melting chocolate but are more of a hassle so I save them for milk chocolate.

Once we had a working batch of melted chocolate we mixed in the condensed milk and then chose the extracts we wanted. We made a batch of mint, and a batch of almond. This then goes into the fridge to chill. Unfortunately it still comes out a bit gooey and molding it into balls can be a little messy. Return  the formed balls to the fridge so they firm up more  and can be easily handled. Then you dip them into the melted candy melts and apply decorative toppings (crushed almond for the almond extract for example). While the recipe calls for a half hour in the fridge, they are still a sticky at that point and thus dipping was a little difficult. We also had some trouble getting the ball immersed so the bottoms of many of our truffles were not dipped.

After a final chilling step these were ready to eat.

The Results

Everyone that we served these truffles to said they tasted great. In fact we gave them to others as part of mishloach manot one year and gotphone calls about how unique and delicious the homemade truffles were. However my results are never as perfect as those pictured. They balls are a little less round or imperfectly dipped. I also suggest longer chilling times – wait until the balls are not sticky to handle them.

IMG_0855

Krantz Cake (Babka)

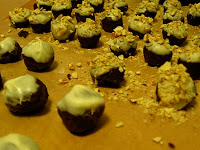
Jerusalem is one of those cookbooks that I just could not resist. It had everything from history, culture and delicious food to stunning photographs and a mix of exciting cuisines. It did not hurt that most of the recipes looked kosher as well. While many of the recipes feature Sephardic and Arabic cooking, standout favorites of Ashkenazi culture are also represented. Any Self respecting Ashkenazi would assume that Babka, or Krantz cake, would make the list. And it did. With spectacular photographs. I was so eager to see if the results would match the photos, this was the first recipe form Jerusalem that I tried.

Ingredients:

For the dough:

flour, yeast, water, salt, sugar, sunflower oil, butter (I used Earth Balance), lemon zest, eggs

Chocolate Filling:

cocoa, dark chocolate, confectioners sugar, pecans (I left them out), sugar

Cinnamon Filling:

melted butter (I used Earth Balance), muscovado sugar, cinnamon

I had to search five different supermarkets before I could find one that carried sunflower oil and another that carried Muscovado sugar. This sugar is apparently a dark sugar made from sugar cane juice that is stickier and moister than other brown sugars. In a pinch I would bet brown sugar would work fairly well.

The Process:

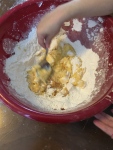
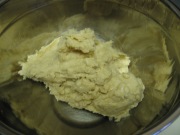
I have never made a yeasted cake before, so naturally I decided to go all out and try the cinnamon and chocolate varieties. The dough recipe is actually for two cakes anyway. I made this dough using the dough hook on my stand mixer and I really think you cannot do it without one. Hand mixers will break and kneading by hand is tedious. Pouring the ingredients in the right order was not hard (although I did manage to zest my finger along with the lemon on a microplane grater). The trick to this dough is to keep stopping the mixer to scrape down the sides. It seems like a ridiculous amount of butter goes into this dough and you want to make sure it is all incorporated into a nice ball. BY scraping down the sides you ensure everything gets mixed thoroughly.


The dough ball then sits in the fridge for at least several hours although overnight is recommended. I went ahead and did the overnight route, photographing my dough before and after. I did not see a dramatic gain in volume.

Before


Rolling out the dough the next morning was actually fairly easy. I simply floured my rolling surface and

Chocolate Babka
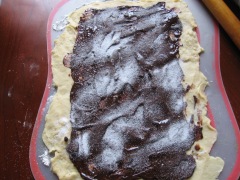
was pleasantly surprised to find the dough, when chilled, was not too sticky. The chocolate filing was honestly delicious to eat before it went on the dough, and spread quite nicely. Followed by a dusting of sugar the chocolate babka was ready to roll. Although the recipe calls for nuts to be added a this point, we have an allergy friendly house so I left them out. The cinnamon babka called for melted butter to be brushed onto the rolled dough rectangle, followed by a dusting of cinnamon and Muscovado sugar. I found the quantity of butter was excessive. I ended having some drip off the cake onto the table and floor and I was in a race to roll this thing up before more oozed off.


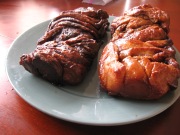
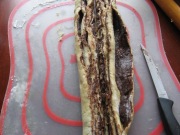
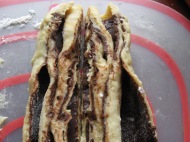
 The most interesting part of this recipe to me was the shaping of the krantz cakes and the accompanying photos. You have rolled a large rectangle into a long cigar shaped log and you proceed to slice it in half LENGTHWISE. Then, with filling exposed, you wrap one end of the split log around the other, seal it and pop it into a loaf pan. I was afraid the dough layers would fall apart on me. They did not. I was actually able to get decently looking shaped cakes into the loaf pans.

STA_0939

STB_0940


STA_0942


The formed babkas need to sit for 1.5 hours in a warm spot to rise after which they can be baked. This is where the tedium of babka comes in. It’s not that hard to make, it is just time consuming and requires numerous resting steps. There is no way this can all be accomplished during a child’s nap. Therefore I ended up rolling my cakes with a toddler tugging on my skirt going “this, this” trying to get at the dough. I removed them from the oven just as she woke up and tried to get at them again. I can’t blame her. They smelled great.
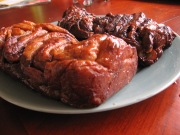
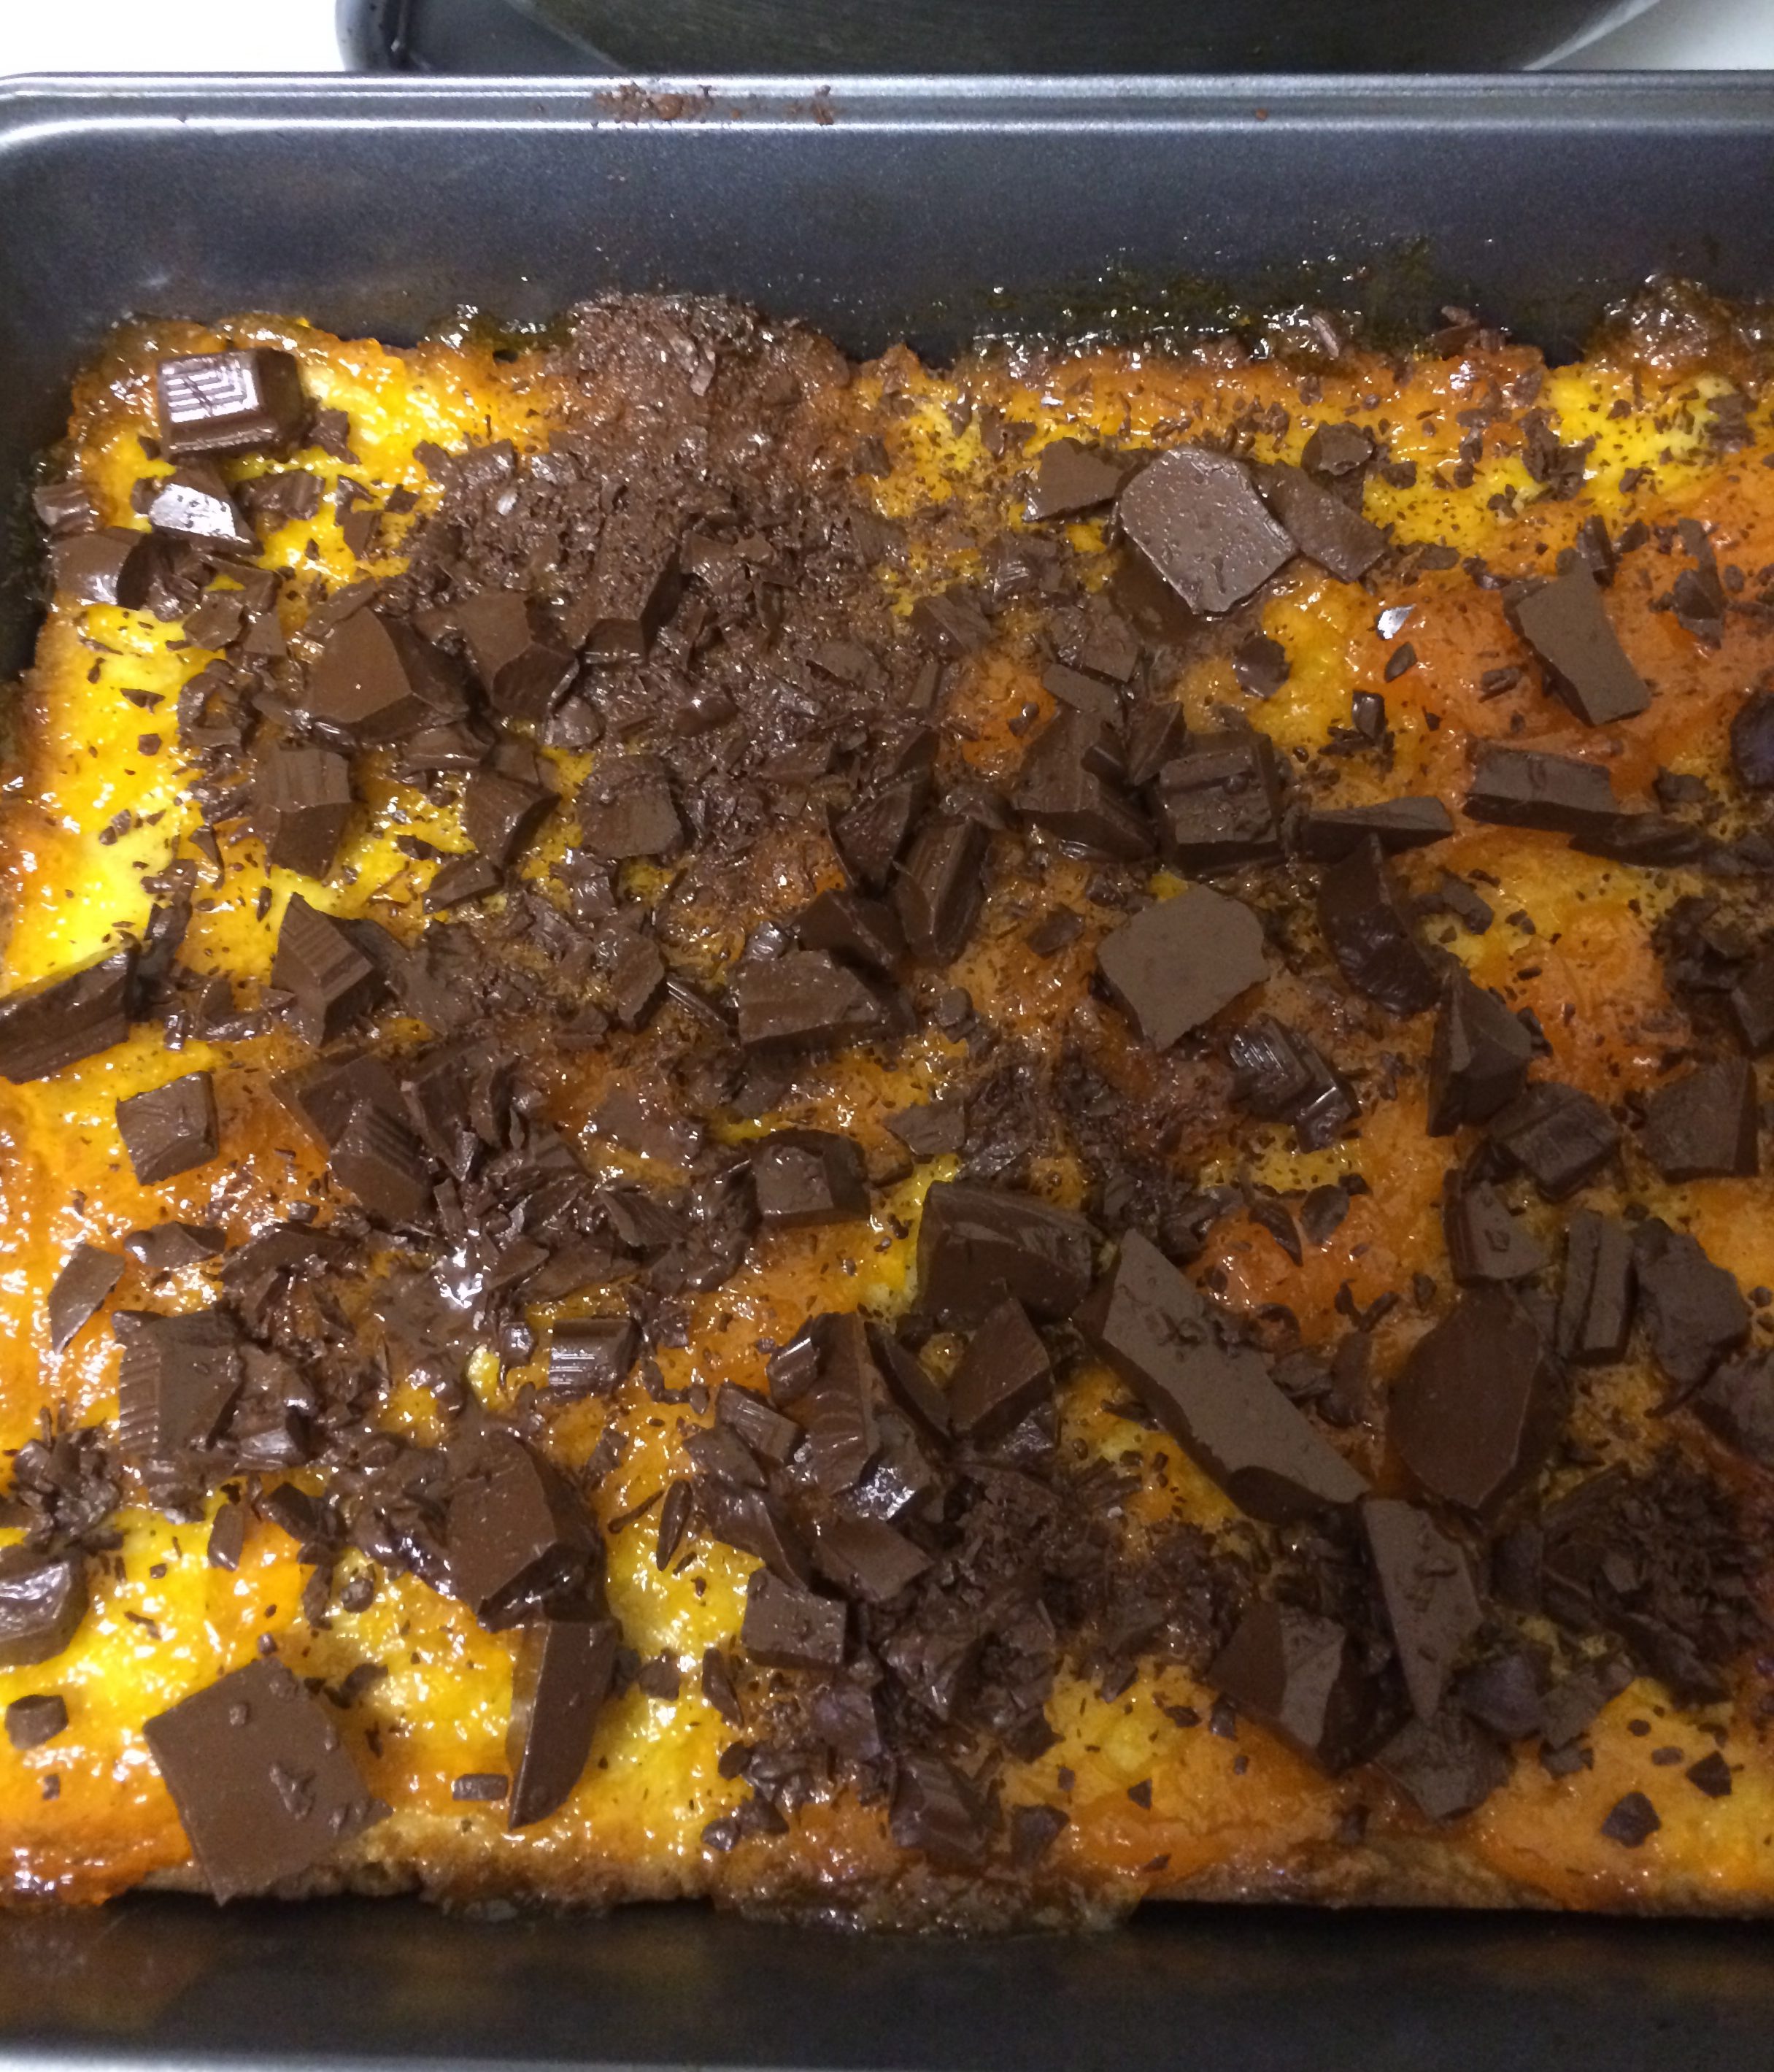
OncCake in Puddles of Syrup
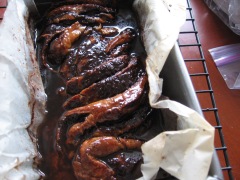
e out of the oven, the cakes get brushed with a syrup of sugar dissolved in hot water. At first the amount of syrup seems to be way too large for just two cakes, but the recipe was very clear that I must use all of it. This resulted in puddles of syrup pooling around my cakes in their loaf pans and a feeling of despair that all this work was ruined. However the cakes do absorb the syrup and I periodically went back and brushed some of the puddle over the top to help the process along. Once most of the syrup was absorbed I removed the warm cakes onto a platter and they looked really delicious, although flatter than I would expect Babka to be.

The Results:

Both the chocolate and cinnamon Krantz cakes tasted wonderful. In four days both cakes were completely polished off. However, I would note that babkas traditionalists might prefer to classify this as kokosh cake since it is incredibly moist and does not gain as much height as many other babkas. Regardless, I was happy I followed the directions and used all of the syrup as it made the cake moist and sweet. The toddler was also pretty happy when she finally got her slice.

STB_0947

STA_0946